Tallinn Estonia. Slawek Staszczuk Photography Workshops.

How to use polarising filter to control contrast

Why worry about contrast?

If you’ve been taking photos for any length of time, you will have noticed that sometimes the camera fails to properly capture contrast in your scenes. Or in other words, sometimes the picture looks more contrasty than the scene did to your naked eye. In extreme cases vast portions of the image, which should have tonal variations in them, appear either purely white or black, devoid of any detail.

If you haven’t noticed that yet, try photographing the interior of an unlit room during the day while pointing the camera at the window. And then see how the image compares to your own perception…

These discrepancies between what we see and what the camera captures arise from the differences in dynamic range. Put simply, we can register a much broader range of tones in a single glance than the camera can in a simple exposure.

Sometimes the tonal span of a scene may be even within the camera’s dynamic range, that is no clipped whites or blacks occur in the photo. But the image contrast is still much harsher than what it appears to the eye.

Use of polarising filter to control contrast. Slawek Staszczuk Photography.

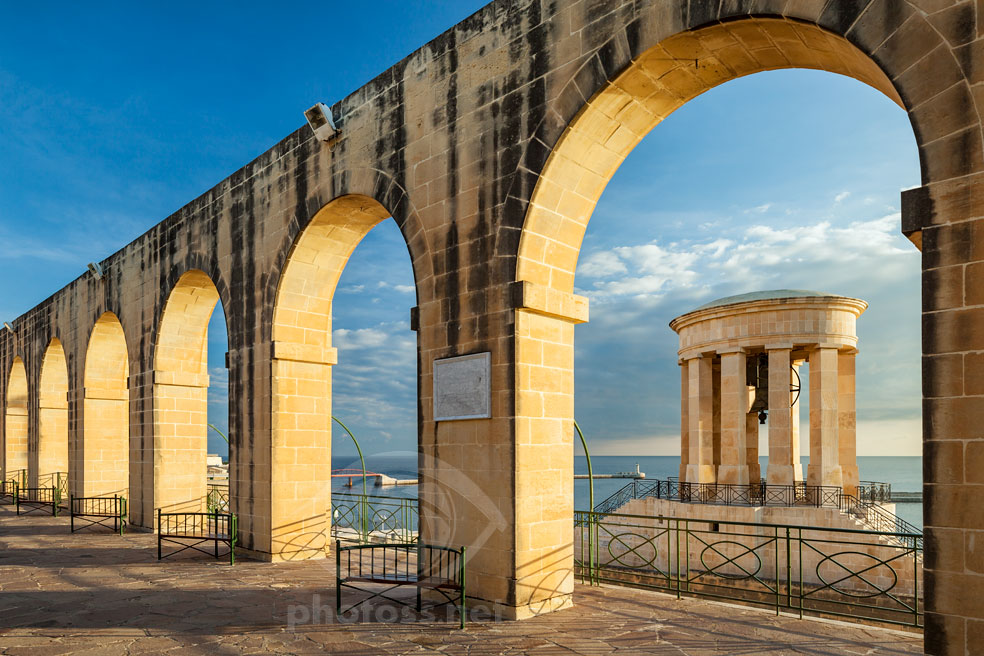
Morning at Lower Barrakka Gardens in Valletta, Malta.
The polarising filter darkened the sky substantially and allowed more light to reach the shaded parts of the structure.

HOW TO DEAL WITH EXCESSIVE CONTRAST IN FRAME

To help our cameras see more eye to eye with us, we can use filters during exposure. Or we can use software tools afterwards. to bring the resulting image closer to our perception. Namely HDR technology or exposure blending. And in less severe cases – regular tonal correction tools might be enough.

Since I always prefer to do as much as possible in camera, I favour the use of filters.

When most landscape photography practitioners hear about filters used to control contrast, the first thing that springs to mind is most likely neutral density graduated filters (ND grads). But in specific situations a polarising filter can be no less useful, and often times it is a more precise tool.

Polarising filter to control contrast. South Downs Sussex Landscape.

Spring afternoon on the South Downs near Brighton.
The polarising filtered darkened the sky here and moved it tonally closer to the land.

What polarising filters do

The scientific principles of light polarisation are beyond the scope of this short article. (And admittedly beyond my modest knowledge.) But thankfully we don’t have to know exactly how polarising filters work. We do, however, need to know their practical applications and how they can possibly improve our exposures. And in practice they can block some of the reflected light coming through the lens.

NOTE: the most commonly used type of polarising filter is a circular polariser, CPL for short. So I’m using these terms interchangeably here: polariser, polarising filter and CPL.

PRACTICAL USES OF POLARISERS

Polarisers have two major practical uses in outdoor photography. First, they can reduce reflections and glare on non-metallic objects. For instance, sheen on leaves; or they can block some of the light reflected by atmospheric particles, thus helping us “cut through haze” and increase the saturation in the image.

Second, they can darken skies in certain situations. And it’s the latter characteristic that can help us reduce the contrast when our frames include skies. (Read a short passage about the usefulness of glare-reducing properties of polarising filters in my article about photographing woodlands.)

Warsaw Barbican and city walls. Photography Services and Tuition Slawek Staszczuk.

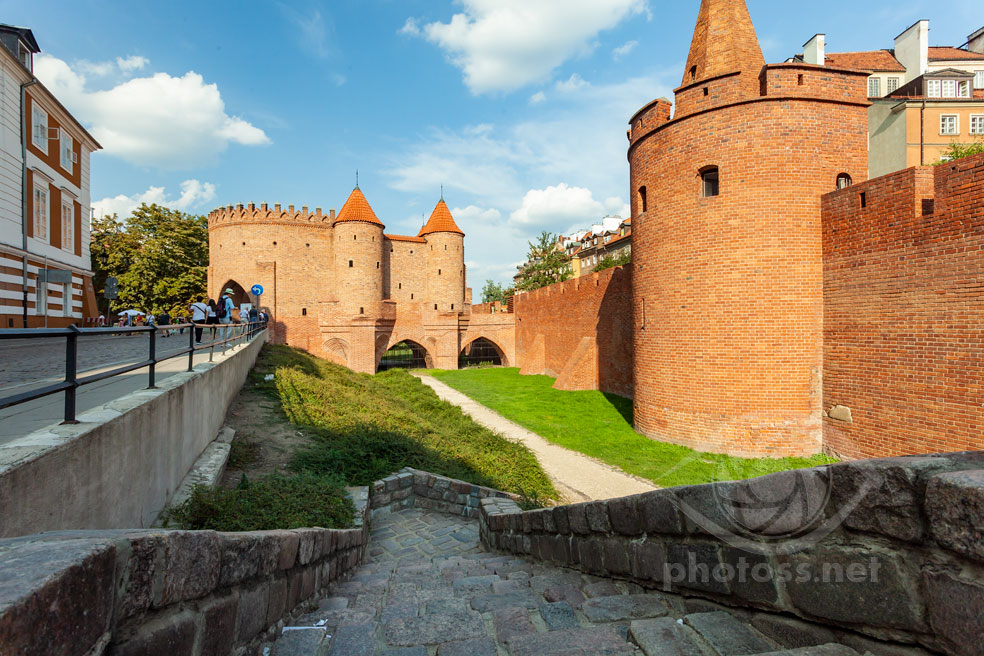
Summer afternoon at Warsaw city walls.
Even though the sunlight was coming from behind my left shoulder, I still managed to darken the sky slightly with the CPL. I didn’t use any other filters.

Sky in the frame

The sky is very often the brightest portion of a landscape photograph, sometimes orders of magnitude brighter than the rest of it. And the contrast between the sky and everything else in the frame may be too much for the camera to handle. In effect, you can choose to “expose for the sky”, meaning adjust the exposure so that the sky will come out properly exposed, without any clipped whites. This comes at the cost of underexposed land.

Or you can expose for the land, which will give you an overblown sky, but proper tonality in the rest of the image. Or possibly, you could try to expose somewhere in the middle, and then use software tools to recover the lost detail in the under- and over-exposed areas.

But you could also mitigate the excessive contrast through the use of filters, and thus squeeze the broad tonality of your scene within the camera’s limited dynamic range.

Rye, West Street. Sussex Landscape Photography.

West Street in Rye, East Sussex.
More the half of the frame was in the shade here. CPL allowed to darken the sky and in effect lessen the harsh contrast between it and the architecture.

When you’re photographing out in the open, and the horizon is a straight line or very close to it, a ND grad will probably be the best option. But sometimes the horizon is very far from straight.

Imagine you’re on a street, trying to photograph a scene including buildings on either side. The skyline will have a very irregular shape. And ND grads are blunt tools, with transition between the shaded and transparent parts following a straight line. Thus usually they’re not best suited for such environments. This is where a CPL can come in handy – when certain conditions are met.

DARKEN THE SKY - LESSEN THE CONTRAST

The sky-darkening effect of polarising filters is strongest when the sunlight is coming from the side, roughly at a 90° angle to the camera’s line of sight. Besides, the sky needs to be at least partly clear. The filter won’t have much discernible effect on an overcast sky.

With these two conditions met, when you twist the CPL to its most effective, it will block some of the light coming from the sky. To the camera it makes no difference whether the light around you suddenly got dimmer, or you placed a filter on the lens. Its light-metering system receives less light, so it will indicate that you need to increase your exposure. Or, if you’re on a (semi-)automatic mode, it will increase the exposure for you. (Read about my recommended shooting mode and other camera settings for landscape photography here)

Riga, Latvia. Travel Photography Slawek Staszczuk.

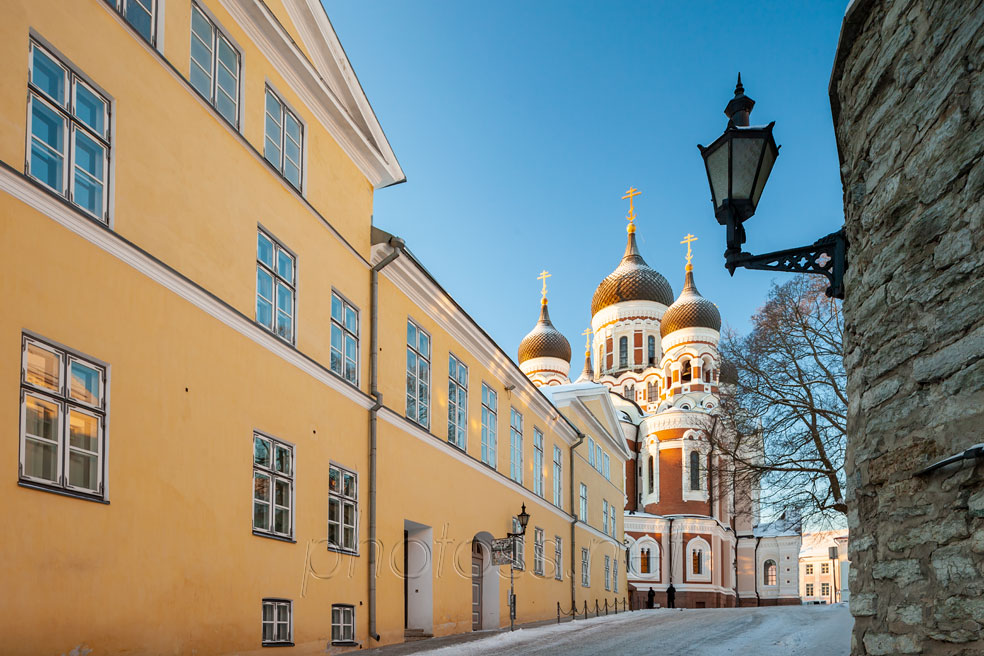
Winter morning in Riga old town.
The polariser darkened the sky, which resulted in a slower shutter speed. Consequently, the shaded parts of the frame received more light, and the contrast between them and the sky diminished.

As a result, the areas in your image corresponding to the sky will receive more exposure, which can often seemingly nullify the darkening effect of the filter. But, at the same time, the rest of the frame, which was unaffected by the polariser in this way, will also receive more light. Therefore, it will come out looking brighter. So as a “net effect”, the CPL can serve to brighten up the unaffected parts of the image more so than it does to darken the sky.

USE HISTOGRAM & EXPOSURE COMPENSATION

Of course, you may need to apply some compensation (in a broad sense, meaning a deviation from what the light-metering system tells you), in order to achieve a correct exposure. This can, and should, be assessed by consulting the in-camera Histogram.

But anyway, the end result of using the polariser in this manner will be the bridging of the tonal gap between the sky and the rest of your image. And this in turn should bring the resulting picture closer to your perception of the scene. These changes will also be reflected in the Histogram – the “mountain peaks” will move closer together, the troughs between them will become less deep – an indication of smoother tonal transitions.

Limitations and pitfalls

CLEAR SKY & LIGHT DIRECTION

The limits of this approach are probably self-evident. You need a clear sky in the frame, and you need the light to come from the side. But these are not exactly the worst conditions to photograph landscape or architecture. Sunlight coming from the side can often produce a sculpting or modelling effect on the features in your scene (it will obviously also depend on its angle to the horizon). And as such this is one of the more desirable lighting scenarios you may find yourself in.

Moreover, you don’t even need direct sunlight for the polariser to work in this way. For example, it can be just as effective when used in Blue Hour photography, whether at dusk or before dawn.

Use polarizer to control contrast in frame. Krakow old town.

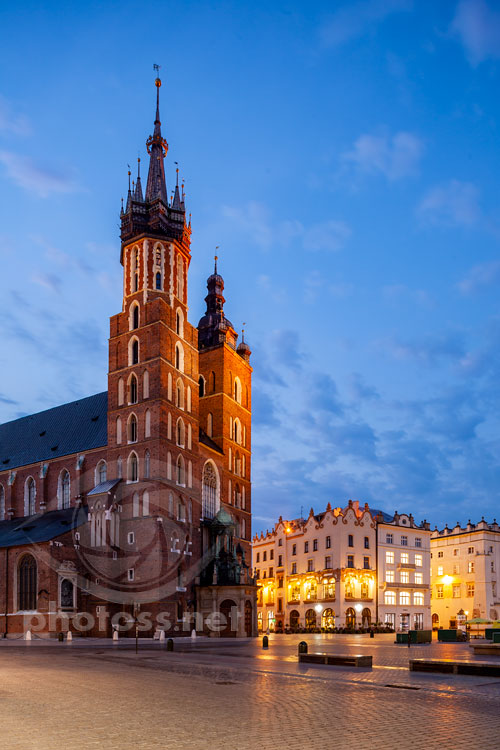
Dawn in Krakow old town.
The sky was already getting a bit too bright at this stage. I used a polariser to darken it and create better tonal balance in the frame.

WIDE ANGLE LENSES

Because the filter is most effective when the light is coming from the side, that necessarily means that its effect is weaker, or imperceptible, in any other situation. This can be a problem when you’re using a wide angle lens and you include a broad expanse of the sky in the frame. Different portions of the sky will be affected by the CPL to varying degrees. And that can create a very unnatural effect, which often looks like a large dark stain in the sky. I believe polarisers can be still useful on wide angle lenses, but should be used with caution.

Clouds can sometimes mask the unevenness of polarisation on the sky. And when there is only a small wedge of the sky between other objects in the scene, this limitation usually isn’t an issue.

LIGHT REDUCTION

Another possible limitation is that polarisers block a lot of light from reaching the sensor, about 1.5 f-stops. For that reason you may need to increase the ISO or open up the aperture in some cases, to compensate for this loss of light. That is when moving objects in your frame or camera shake are a concern. Although, by the same token, the reduction of light can also be an advantage when you’re doing long exposures in daytime.

"BUT I CAN'T SEE THE DIFFERENCE"

This is a comment I often hear from my workshop guests. If you don’t know in what situations your polarising filter can be effective, it may be difficult to accidentally stumble upon its usefulness.

When you’re having trouble seeing the effect of the filter on the sky, try looking through it first with your naked eye. Position yourself in such a way that the sunlight is coming exactly from the side, doesn’t matter which. Hold the polariser close to your eye and look at a blue patch of the sky, then start slowly turning it. You will see a difference, and its strength will depend on the atmospheric conditions.

Besides, on cameras with electronic view finders, or when you’re working with live view, the polarisation effects on the sky may be a little more difficult to appreciate. That’s because most cameras are configured to automatically adjust the display brightness to the changing light. Since the polariser darkens the image overall, the LCD will brighten to make up for the change. I’d suggest you start by looking through the filter with your naked eye, as described in the previous paragraph. Over time your eye will get more sensitive to those subtle shifts when using the view finder. Also, paying attention to the live Histogram will help you discern the changes.

How to use polarising filter to control contrast. Bern Switzerland.

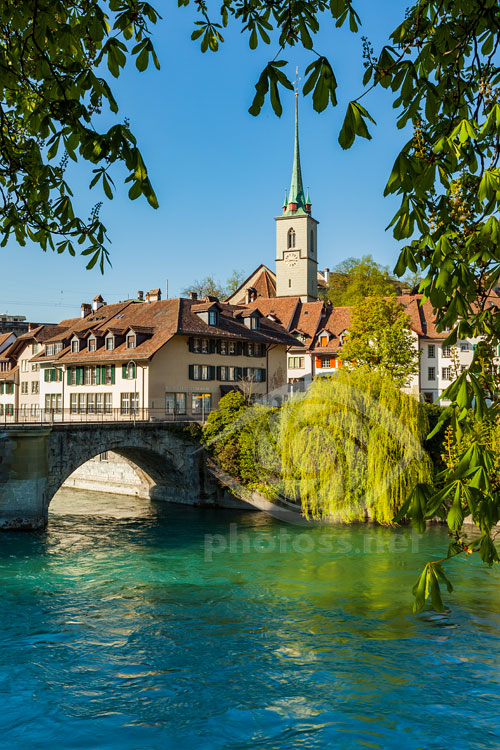
Autumn morning in Bern, Switzerland
Once again, the sky-darkening effect allowed me to get more light onto the shaded parts of the image.

FINAL THOUGHTS

The polarising filter clearly isn’t a silver bullet when it comes to controlling contrast in the frame. And it won’t be useful in all situations. But all tools have their limitations and advantages. It’s important to know what they are, so we can choose the best one for the situation at hand. You can also combine different tools.

To illustrate, I sometimes use the polariser together with ND grads (and afterwards I always apply basic edits in the RAW processing software to bring the final image possibly close to my impression of the scene).

If you haven’t used your CPL in this way before, I trust I’ve convinced you to give it a go.

Thank you for reading, I hope you enjoyed this short introduction to polarisers as a tool of contrast control.

Read other similar articles in my Landscape Photography is Simple “blog”. Or click on a random post below.

Leave a Comment

Your email address will not be published. Required fields are marked *